
In today’s world, you need a website for almost any project or business. Whether you’re a small business owner or a freelancer showcasing your portfolio, learning how to create a website on Canva will help you save a ton of time.
But what if you’re not a coding whiz?
Building a website from scratch sounds very overwhelming if you don’t know what you’re doing. What if you’re just looking for a very simple or basic website as a start? Then overtime you can expand and add more to your site.
Here’s where Canva comes in!
This guide will walk you through the process of setting up a simple website with Canva’s website builder, perfect for your small business, portfolio, or any other project you have in mind.
Now let’s get started!
Disclosure: Our website is reader-supported. If you purchase any service through our partner links, we may earn a commission at no extra cost to you.
Table of Contents
What Kind of Website Can You Create with Canva?
Canva is an amazing tool for creating visually appealing designs, but when it comes to building a full-fledged website, it has its limitations.
You can easily create simple websites or landing pages using Canva’s pre-designed templates, add your own images and videos, and even embed some cool features.
However, it’s not suitable for websites with advanced features like e-commerce or membership sites.
Using Canva’s Website Builder
Canva’s website builder offers a variety of website templates, both free and exclusively for Canva Pro users.
If you’re on the free version, you can either start with a blank template and build from scratch, or you can check out all the free templates they have—there are tons to choose from.
Step 1: Create a Canva Account
First, start by signing up for a free Canva account if you don’t have one.
You can create a Canva account right now.
Next, let’s start our search. You want to look for website templates by searching for “Websites” in Canva’s search bar.
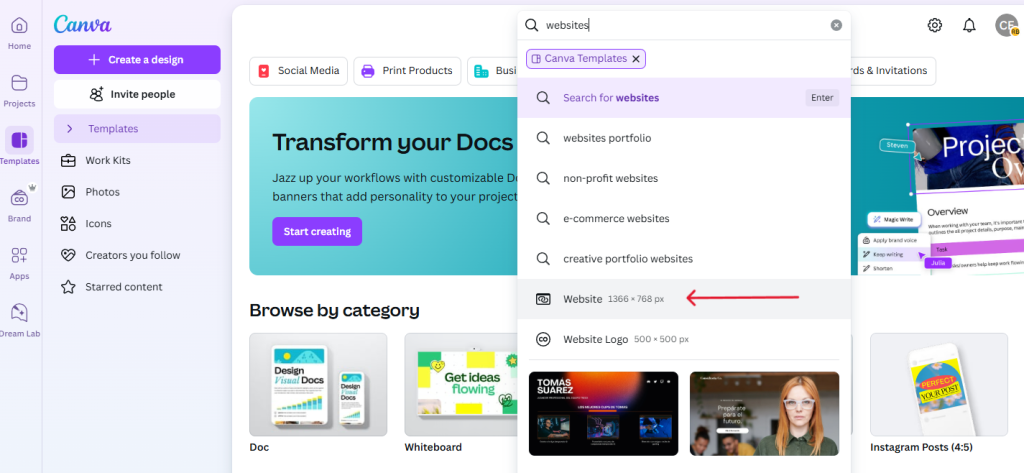
Then, from the many different styles available to you, select a template that you like and fits your aesthetic and brand theme and click “Customize this template.”
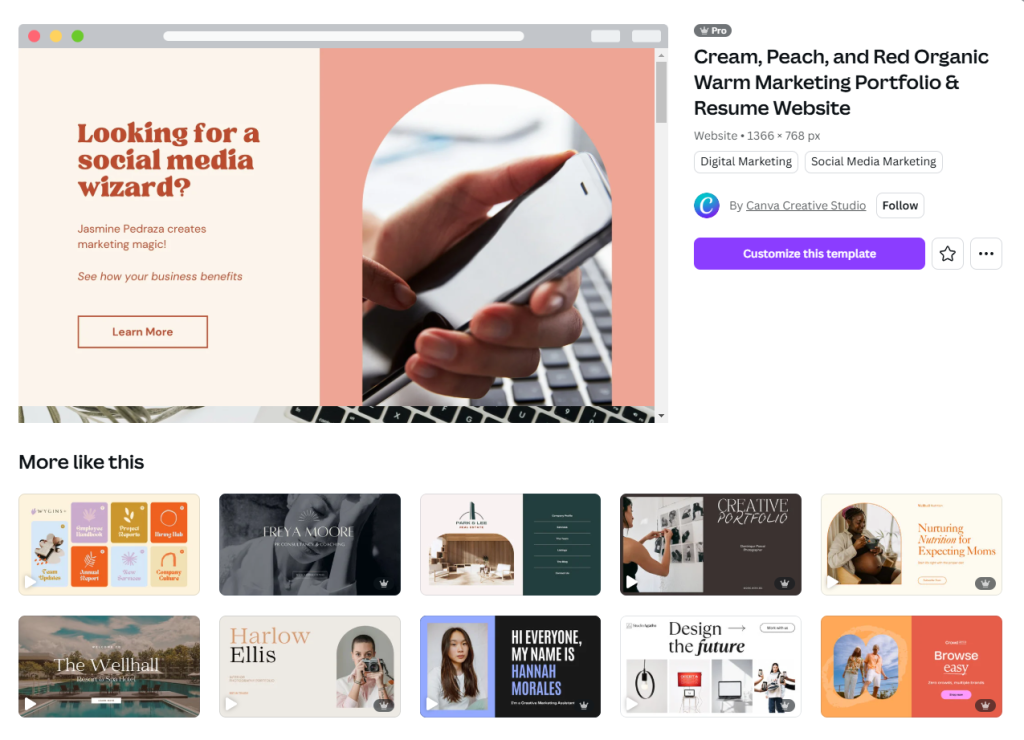
Step 2: Customize Your Template
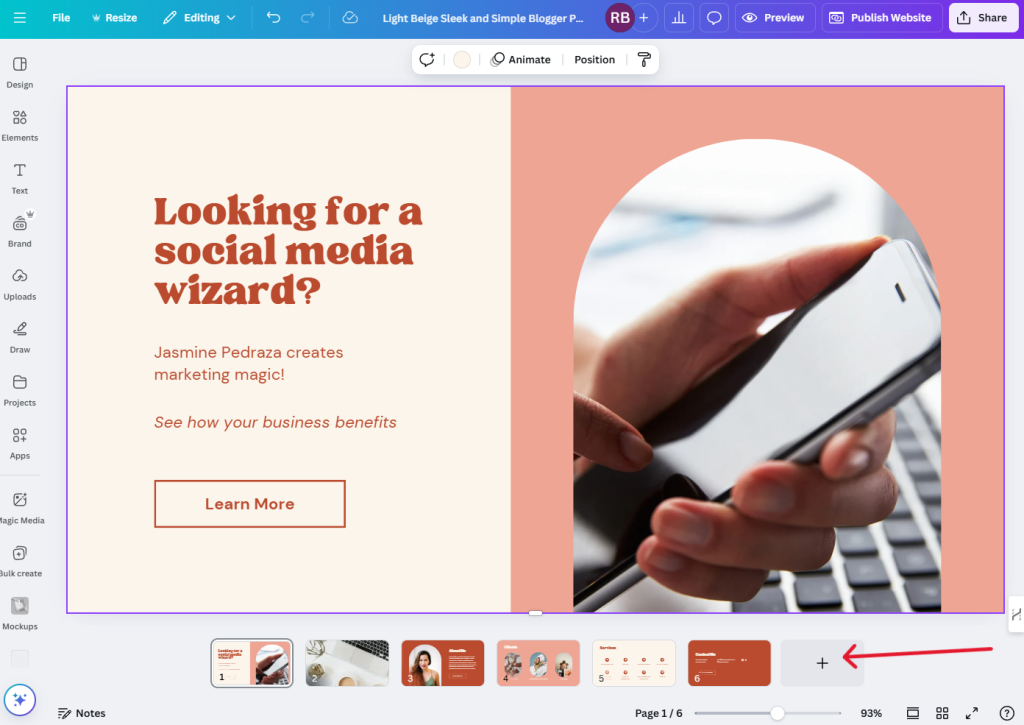
Now it’s time to personalize your chosen template within Canva’s editor. You can easily customize it with your brand colors, images, graphics and more until you reach your desired result.
The left sidebar of the editor offers all the necessary resources and tools for creating your website.
The top bar provides easy-to-use tools for editing specific elements (font style, font size, colors and more).
If you want to add, rearrange or remove pages, use the bottom bar to customize to your preference.
Once you’ve finished customizing, be sure to add all important links you would like your viewers to be directed to. This will help your visitors properly navigate to the resources or calls to action you’ve set up.
We will cover how to do this on the next step.
Step 3: Adding Interactive Features
For example, imagine you’re a consultant wanting to track leads through a form (collecting first name, last name, email, and phone number). To properly gather information from potential clients before they reach out, be sure to include the right questions in your contact form.
This is where a form builder like Tally comes into play.
The great thing about Tally is that it’s super user-friendly, so you don’t need to be tech-savvy to get started. They offer a wide range of templates to help you quickly create professional forms.
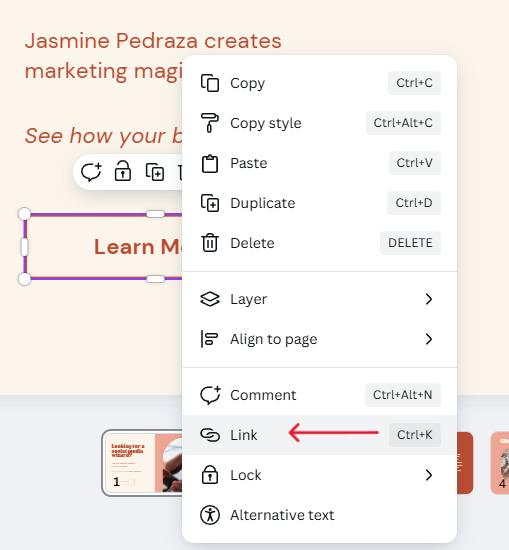
Once you’ve designed your form in Tally, simply add the form link to your Canva website.
To do this, select any text or element on your website, right-click, and click “Link”.
Step 4: Choose a Domain Name
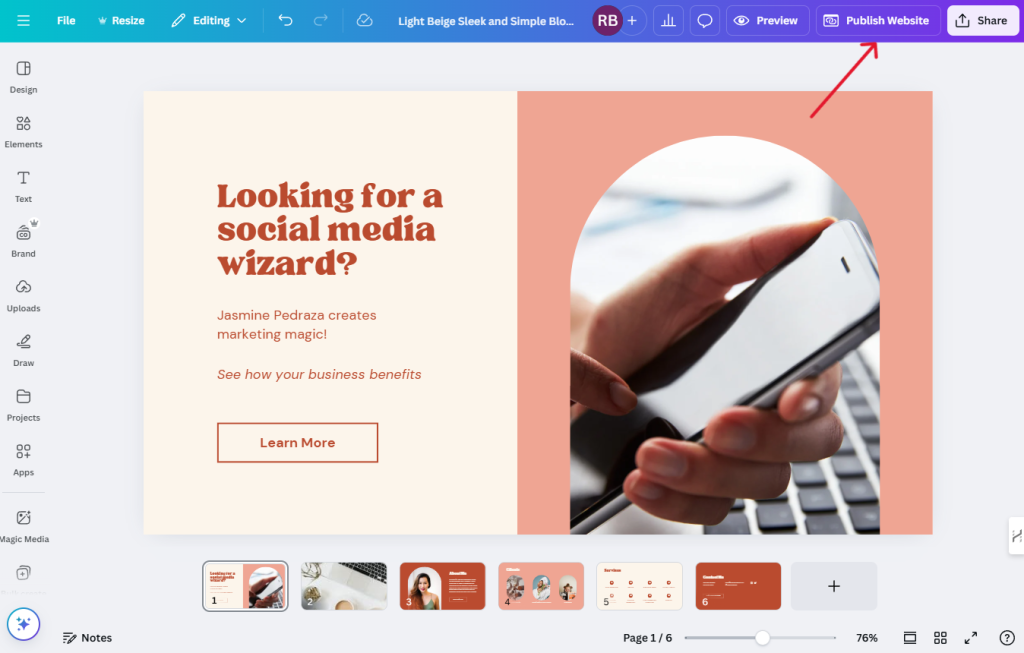
The final step is to publish your website! Click the “Publish as Website” button in the Canva editor on the top right of your screen.
You can then choose to use your own domain, purchase a new domain name or use Canva’s free subdomain option (e.g., yourname.my.canva.site) to quickly get your website online.
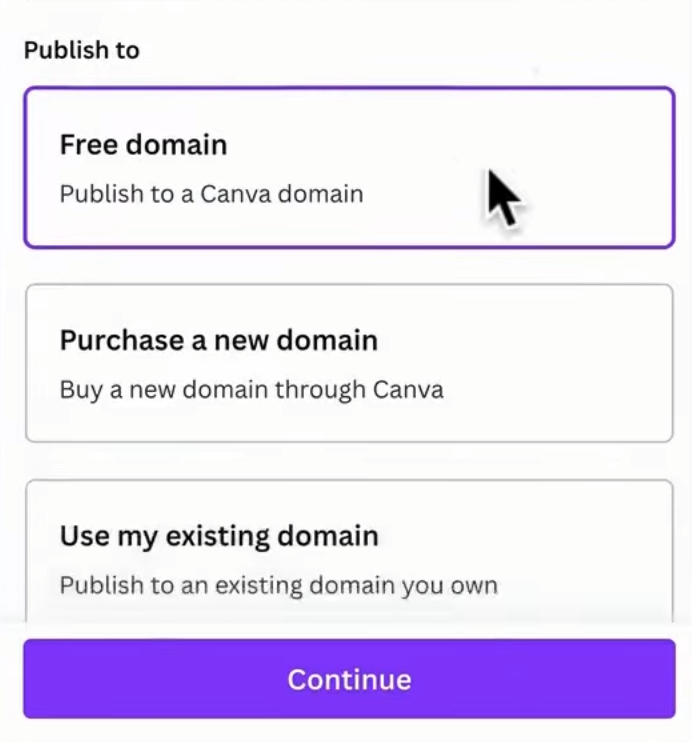
Follow the simple steps within Canva to finalize your domain and publish your website!
Note: If you’re using the free Canva plan, you’ll be limited to using their free subdomain (e.g., yourname.my.canva.site).
While this is a convenient option, consider purchasing a custom domain name (such as mybusinessname.com) for a more professional online look.
Once you’ve decided on a domain, click “Continue” and follow the next steps to publish your website.
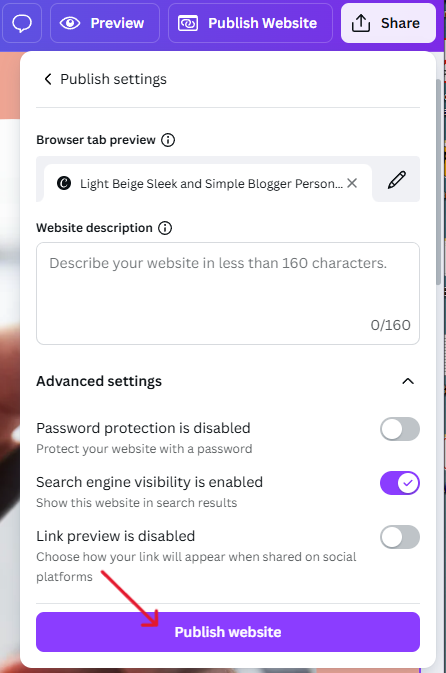
Step 5: Finalizing and Publishing
Before you hit “Publish,” let’s add some finishing touches to your website. To grab your visitors attention, write a short and interesting description of your website.
Briefly explain what your website is about or what services you offer.
Once you’re satisfied with all the details, simply click “Publish” to go live and share your website with the world!
Frequently Asked Questions
- Can I add payment features on my Canva website?
- No, Canva doesn’t support payment features directly. Consider other platforms for e-commerce needs.
- Is it possible to update the website after publishing?
- Yes, you can edit and republish your Canva website.
- Are Canva websites mobile-friendly?
- While many templates are mobile-friendly, double check using Canva’s “Preview” feature to view on mobile devices.
Final Thoughts
You might be surprised at how much you can do with Canva’s website builder and Canva overall.
There are tons of cool features you might not even know about. It’s packed with hidden gems that can really help you bring your vision to life.
So get creative and let your imagination guide you.
👉 Follow me on Pinterest for more tips on wealth, money and business!
Learn More Online Skills To Make Money
- How to Start Freelancing with No Experience
- Free Logo Maker Sites: 5 Easy to Use Design Tools
- 5 Underrated Side Hustle Ideas that Make $8,000 a Month
- How to Make $1,000/Month Selling PDFs
- 5 Best Freelance Websites For Beginners
- How to Sell on Etsy as a Beginner and Make Your First Sale
My Favorite Tools
To help you reach your financial goals, below are resources you can use to get started. They are free to sign up and will support your money goals.
- Check your credit for free with Credit Karma
- Get 3 or 20 free shares with the Webull app
- Get $30 cash back when you start shopping online with Rakuten

Leave a Reply